Playstyle
How Ghost Rider plays
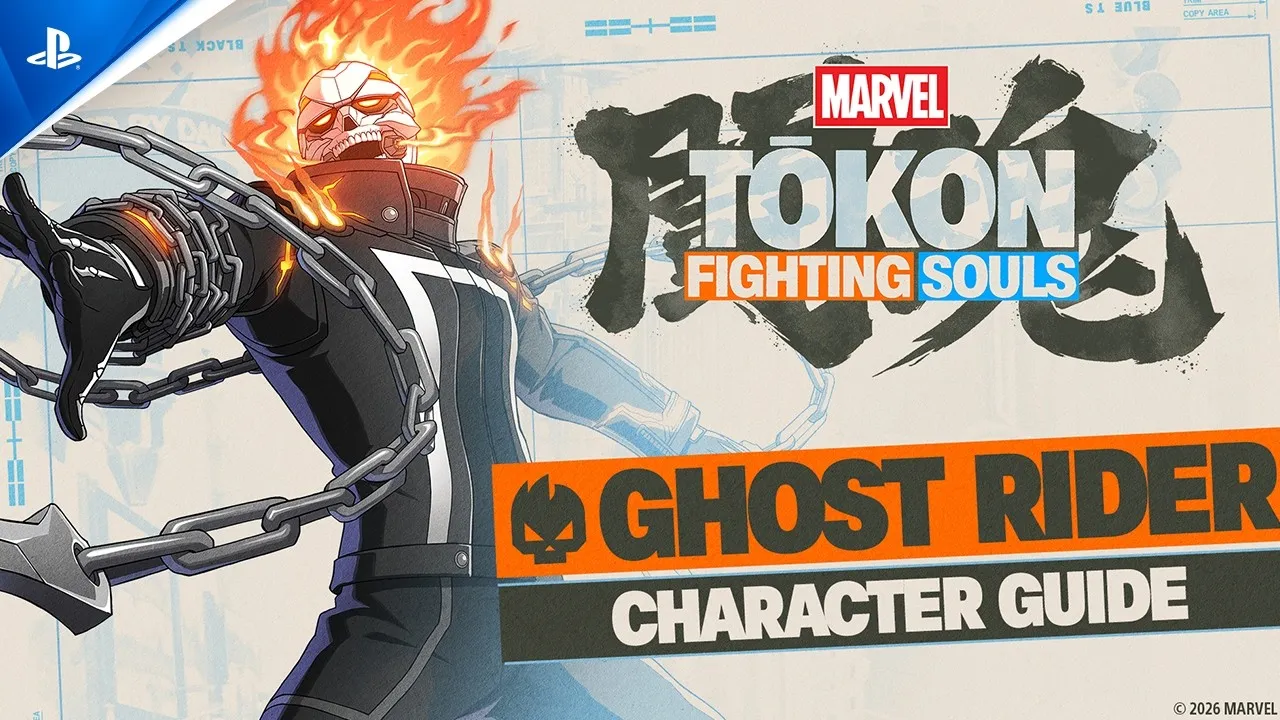
Robbie Reyes rides in from East LA as a mid-to-long-range chain-and-fire zoner. His defining feature is the Vengeance Gauge: every Skill he throws pushes it from Zone 1 to Zone 2 to the Red Zone, and in Red Zone his specials fire their strongest, EX-like versions without spending any meter — turning ordinary pokes into big-damage, screen-covering threats. He fences opponents out with far-reaching chain normals (5L/5M/5H), Hellfire (236X), and Hell Scorcher (22X, which reaches almost anywhere on the ground), then closes the gap to open them up with Judgement Cradle's (214X) canned low/overhead and tick-throw follow-ups, the unreactable Penance Driver (623X) command grab, and a very fast rising overhead in j.2H.
The kit is genuinely strong, so why only B? Ghost Rider is feast-or-famine. Until the gauge is revved he leans heavily on meter and assists for damage, and once it is revved he is one mistake from Overheat — maxing the gauge freezes him out of specials and hands the opponent a punish. Red Zone is his biggest payoff and also the hardest state to manage, so even good players eat the occasional overheat. His chain normals also carry extended hurtboxes that can be clipped at range, making neutral riskier than it looks. Pair that with the demanding 2-star execution rating and you get a high-ceiling character whose early reads are niche — hence B on our launch list, though several community lists slot him B-to-A.
TokonGuide Editorial · Launch patch · August 2026
Strengths
- Long chains: his normals and several specials have impressive disjointed range, with good coverage across ground pokes, anti-airs and air-to-airs — and tools like 22X (Hell Scorcher) and 236M+H (Inferno Engine) reach basically anywhere on the ground
- Vengeance Red Zone: once the gauge is maxed his specials automatically fire their strongest versions for free, acting like EX moves without spending meter — a huge boost to both neutral and offense
- Deep mix-up suite: an unreactable command grab in 623X (Penance Driver), 214X (Judgement Cradle) follow-ups that branch into a canned low/overhead or a tick throw, a fast rising overhead in j.2H, and an Ultimate that becomes a long-range command grab when spaced
- Specials with distinct jobs — poke, combo tool, pressure ender, anti-air bait — so you're rarely starved for a reason to use one, which makes building the gauge easy
- Prized lockdown assists: his Assault Assist mirrors Hell Scorcher (a near-full-screen ground flame) and his Shooter Assist mirrors Judgement Cradle (a long chain), giving aggressive point characters a screen-covering call to open the door
Weaknesses
- Vengeance Overheat: overuse the gauge and he maxes out, locking him out of specials, guaranteeing a lost turn and often a full punish. Red Zone is the strongest but hardest state to hold, so occasional overheats are basically unavoidable at high level
- Extended hurtboxes: his chain normals — especially the air ones — stick his hurtbox out and can be clipped by a stray anti-air or poke, so neutral must be played carefully
- Resource- and assist-reliant early: before the gauge is revved his solo damage is modest and he depends on meter and assist extensions to convert
- Execution- and knowledge-heavy: rated 2/5 stars officially, with long, team-dependent optimal routes that ask a lot of the player
Signature kit
Signature tools
Inputs
Ghost Rider Move List
| Move | Input | Notes |
|---|---|---|
| Vengeance Gauge (Overheat)Mechanic | Passive — builds on Skill use, drains via Unique moves | Fills through Zone 1 → Zone 2 → Red Zone as he uses Skills; higher zones add hits and damage, and Red Zone makes specials fire their strongest, EX-like versions for free. Max it out and he enters Overheat: frozen and unable to use specials until it drains — his single biggest risk. |
| Revelator ChainSpecial | 5U / j.U (holdable · air OK) | His main gauge-dump: swings his chains wildly, decreasing the Vengeance Gauge; hold to extend duration, hits and gauge drain. Cannot be directly cancelled into. The air version stalls air momentum. |
| Hell ThrottleSpecial | 2U | Wraps himself in a flame aura that is briefly projectile-immune and hits all around him. Technically a projectile (can projectile-clash) and greatly decreases the Vengeance Gauge. A panic/reset button and a heavy gauge dump. |
| HellfireSpecial | 236 L/M/H · air OK | Breathes fire in front of him; the aerial version angles downward. Increases the Vengeance Gauge and gains extra hits at higher zones. Core neutral/space-control tool. (A returning name, confirmed as a Tōkon move by Dustloop — not the MvC hyper.) |
| Judgement CradleSpecial | 214 L/M/H | Chain strike used up close for mix-ups — an additional input branches into a canned low/overhead or a tick throw. Increases the gauge; in the corner triggers a Stage Transition, making it his go-to Wall Break ender. Combo ender for the 5L auto-string. |
| Hell ScorcherSpecial | 22 L/M/H | Plants a flame that reaches almost anywhere on the ground; versions hit at different ranges (Heavy tracks the opponent's position). Increases the Vengeance Gauge. Full-screen ground-control / zoning tool. |
| Penance DriverSpecial | 623 L/M/H | Unreactable command grab — summons his car for the slam. Decreases the Vengeance Gauge on a successful hit but increases it on whiff, so it doubles as a gauge-management tool. |
| Inferno EngineSuper | 236 M+H · 50 Skill Gauge | Super Skill: launches his car at the opponent; hits basically anywhere on the ground. Spends some Vengeance Gauge on hit and is the combo ender for the 5M auto-string. |
| Eternal DamnationSuper | 632146 M+H (Ultimate) · 100 Skill Gauge | Ultimate Skill: chains pull the opponent in, then his car crashes through for big damage. Spaced correctly the far version becomes a long-range, unjumpable command grab. Combo ender for the 5H auto-string. |
| Assists (Shooter / Vertical / Assault / Aerial)Mechanic | Assist call (position-dependent) | His assist depends on team slot: Shooter ≈ Judgement Cradle (long chain), Assault ≈ Hell Scorcher (near-full-screen ground flame — his prized lockdown call), Vertical ≈ air Revelator Chain, Aerial ≈ air Hellfire. Tag him in on the assist's hit. |
| Normals & throwsNormal | 5L/5M/5H chains · 2L/2M/2H · j.L/j.M/j.5H/j.6H/j.2H · throw M+H · air throw j.M+H | Chain normals are his long-range backbone. j.2H is a fast rising overhead you can convert from with an assist. Ground throw ~16,000 and air throw ~18,000; a corner throw triggers a Stage Transition. |
Movelist, inputs and the pros/cons framing come from the Dustloop MTFS wiki, whose Ghost Rider page is still marked incomplete for this brand-new release — partial frame data is up but many values haven't been published yet. Combos, damage and video are community submissions from ComboTier; the official 2-star Ease of Use difficulty is reported by EventHubs from the in-game rating. Everything reflects the launch patch and will change as the meta matures. Updated August 2026.
Bread and butter
Ghost Rider Combos
5L > 5M > 5H > 2H > j.5H > j.2H > 5A (assist) > 236 M+H (Inferno Engine)
The game's simple-input auto-combo (mash 5L) routes into the same enders. Damage not yet listed on Dustloop (page marked incomplete for the new release).
Combo: Dustloop
5M > 2M > 5H > 2H > j.M > j.H > j.236L > A (Storm) > QD > 5M > 5H > 214L (Wall Break)
Uses a Storm assist; ends in 214L for the Wall Break. QD = quick dash. A clean starter route for learning his assist conversions.
Combo: ComboTier
5L > 5M > 5H > 6QS > 4H > A (Magneto) > 5L > 5L > 2H > 7L > 5M > QS > A (Blade) > U + QS
Requires Magneto and Blade assists. QS = Quick Skill. A mid-level midscreen route ending in Inferno Engine.
Combo: Truth (via ComboTier)
5L > 5M > 5H > 6QS > 4H > A (Magneto) > 2H > j.L > j.M > QS > A (Blade) > U > A (Doctor Doom) > 5L > 5L > 2H > 5L > 5M > 6QS > 2QS > U+QS
A full-team, wall-assisted optimal route (Magneto + Blade + Doctor Doom). His highest documented launch-week damage.
Combo: Truth (via ComboTier)
Combo video: Truth (via ComboTier)
Movelist, inputs and the pros/cons framing come from the Dustloop MTFS wiki, whose Ghost Rider page is still marked incomplete for this brand-new release — partial frame data is up but many values haven't been published yet. Combos, damage and video are community submissions from ComboTier; the official 2-star Ease of Use difficulty is reported by EventHubs from the in-game rating. Everything reflects the launch patch and will change as the meta matures. Updated August 2026.
Game plan
Ghost Rider game plan
Mid-range control and neutral: Ghost Rider wins by fencing. Use the chain normals (5L/5M/5H) to poke from a range most characters can't answer, and layer Hellfire (236X) and Hell Scorcher (22X) — which covers almost the whole ground — to wall out approaches and, crucially, to feed the Vengeance Gauge. Anti-air stray jumps with your chains. The one discipline here is your hurtbox: those long chain normals, especially the air ones, stick out and get clipped, so throw them with purpose rather than mashing, and respect characters who can teleport or fly under your zoning.
Offense, pressure and assists: once you've cornered someone or earned a knockdown, switch hats and open them up. Judgement Cradle (214X) is the engine — its follow-ups branch into a low/overhead or a tick throw — while Penance Driver (623X) is a genuinely unreactable command grab and j.2H is a fast rising overhead you can convert from with an assist. Call an assist to make these strike/throw mix-ups safe and to extend damage; in Red Zone your specials become free EX versions, so pressure that was merely annoying now does real damage. Finish corner routes with 214X or a throw to force a Wall Break.
Defense, tag and meter: the whole character lives and dies on gauge discipline. Build with Skills, but before you tip into Overheat, dump the meter with Revelator Chain (5U/j.U) or the projectile-immune Hell Throttle (2U), and cash it into hits via Penance Driver, Inferno Engine (236M+H), Eternal Damnation, or simply your Red-Zone specials. Save the 100-gauge Eternal Damnation as a spaced, unjumpable command grab or a combo ender. On defense, remember he has no fast meterless reversal beyond Hell Throttle's aura, so play patient, use your assists to cover tag-ins, and never let a greedy Red-Zone rep get you frozen — one overheat can cost the game.
TokonGuide Editorial · Launch patch · August 2026
Team building
Best Teammates for Ghost Rider
His Samurai Outriders anchor: Blade's Assault assist forces a block into a side-switch that Ghost Rider immediately abuses with his long-range and command-throw mix-ups. In return, Ghost Rider's own screen-covering Assault (Hell Scorcher) assist is exactly the lockdown Blade wants to get in — a two-way pressure loop.
Loki's Vertical assist swings and launches a projectile, sniping opponents out of the sky as Ghost Rider approaches — patching his biggest neutral hole (air-to-air trades that clip his extended hurtboxes) and keeping jump-outs honest while he zones.
A hyper-flexible partner with a solid projectile and an easy pivot to close-range play. He reinforces Ghost Rider's zoning wall from a second angle and gives the team a fast get-in option, while happily cashing in Ghost Rider's long-range chain assist to start his own offense.
See all Marvel Tokon team comps
TokonGuide Editorial · Launch patch · August 2026
Watch and learn
Official Ghost Rider guide video
What the video covers
- Long-range chains
- Scythe attacks
- Hellfire pressure
- Hellcharger
- Vengeance Gauge
- Long-range control with gauge risk
Questions
Ghost Rider FAQ
- Is Ghost Rider good, and what tier is he?
- He's a strong but high-variance pick — B on our launch tier list, with several community lists placing him B-to-A. His long-range chains, mix-ups and Red Zone payoff are top-notch; what holds him at B is how punishing the Vengeance Gauge is to manage and how assist-reliant his damage is early. Great character, niche early reads.
- Is Ghost Rider beginner-friendly?
- No. The game's own Ease of Use rating gives him 2 out of 5 stars, tying him with Danger and Green Goblin as the three hardest characters. Between constant gauge/Overheat management and long, team-dependent combos, he's a character you grow into rather than pick up cold.
- How do I play Ghost Rider?
- Zone at mid-to-long range with chain normals, Hellfire (236X) and Hell Scorcher (22X) to build the Vengeance Gauge, then get in and open people up with Judgement Cradle (214X) follow-ups, the 623X command grab and the j.2H overhead. The whole time you're managing the gauge — dump it with Revelator Chain (5U) or Hell Throttle (2U) before you overheat.
- What are his bread-and-butter combos?
- Start with the beginner jump-chain into Inferno Engine (5L > 5M > 5H > 2H > j.5H > j.2H into 236M+H). From there, learn an assist route that ends in 214L for a Wall Break, then graduate to the Eternal Damnation team BnBs for 50k+ damage. His biggest numbers come from full-team, assist-extended routes, so combo practice is really team practice.
Evidence trail
Official sources
- SRC-PS-USOfficial PlayStation US product page
Sony Interactive Entertainment
- SRC-PS-SAMURAIOfficial Samurai Outriders announcement
PlayStation Blog / ARC SYSTEM WORKS
- SRC-PS-YT-GUIDESOfficial PlayStation Character Guide videos
PlayStation