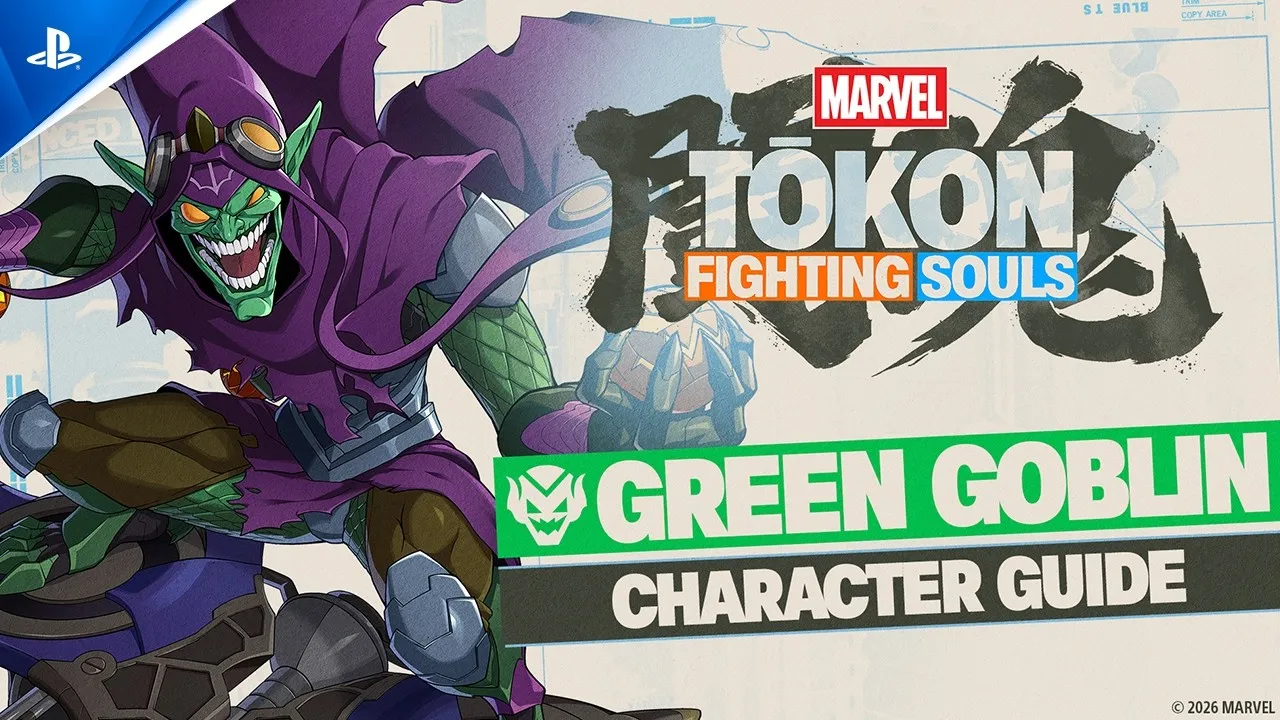
Playstyle
How Green Goblin plays
Green Goblin fights from the sky. His whole kit is built around the Goblin Glider — a rideable stance governed by a dedicated Glider Gauge — layered over one of the deepest projectile toolboxes in the game: the three-chain Razor Bats, the four rotating Pumpkin Bombs (Sticky, Explosive, Poison, Stun), and Glider Raid. On the glider he switches sides at will, threatens high/low and cross-up mix, and converts into long, gauge-hungry combos; off it he zones and covers approaches while the meter recharges. Played well he fills the screen, is genuinely hard to read, and cashes out huge — auto-combo strings link into Tōkon Assemble for 50,000-plus. He is closer to a puppet/zoner than a straightforward rushdown character.
The catch — and the reason his placement is contested — is that all of that sits behind a steep tax. The game itself rates him 2 stars (its hardest tier), and specialist coverage is blunt about the downsides: stubby mid-range normals, mix-ups that are unreliable because the Pumpkin Bomb you get is cyclical, and a signature Super that burns his own Glider Gauge. When the gauge empties he loses most of what makes him special and is left vulnerable — a feast-or-famine pattern that caps his floor. That split is why the numbers disagree: specialist tier lists (Screen Rant, Destructoid, Mobalytics) land him at B, while write-ups like Sportskeeda rate his aerial offense and combo ceiling high enough to call him 'one of the strongest'. We keep him at B: a high-ceiling, low-immediate-payoff specialist, not a launch-week easy button.
TokonGuide Editorial · Launch patch · August 2026
Strengths
- Elite air and side-switch mobility: every Glider Dash variation cancels into other Glider Stance options (including another dash), so he repositions, pressures and extends combos while staying airborne
- Screen-filling projectile kit: Razor Bats chains up to three shots, Pumpkin Bomb cycles four status effects, and Glider Raid adds another angle — his neutral becomes very hard to predict, and he can play pure runaway or cover an approach
- Layered mix-ups: Shock & Awe's Medium/Heavy versions hit overhead, the glider adds fast highs plus dedicated lows (held 1/2/3+H), and glider dashes give left/right cross-ups
- High damage ceiling: auto-combo into Tōkon Assemble reportedly exceeds 50,000, and the Goblin Surprise Ultimate exceeds 40,000 (Sportskeeda)
- Unfamiliar, unorthodox toolkit: opponents rarely know the matchup, and his gimmicky options are inherently awkward to defend
Weaknesses
- Feast-or-famine resource: the moment his Glider Gauge is empty he loses his best tools and must retreat to recharge, leaving him exposed
- Weak on the ground / poor mid-range: his buttons are stubby and easily stuffed, and he lacks a lot of what makes him special when on the ground, forcing hit-and-run
- Unreliable mix and conversions: Pumpkin Bomb's cyclical order means you can't always get the bomb you want, adding a mental stack and making damage/setups inconsistent
- High execution, low immediate payoff: 2-star official difficulty, and his 50-cost Super burns Glider Gauge — his reward comes only after heavy investment
Signature kit
Signature tools
Inputs
Green Goblin Move List
| Move | Input | Notes |
|---|---|---|
| Glider (Unique mechanic)Mechanic | Glider state, tracked by the Glider Gauge | His defining system. While mounted he gains flight, glider dashes and glider attacks; the Glider Gauge drains while active and must recharge once emptied before he can remount. Nearly all of his identity — mobility, mix, combo extension — lives here. |
| Glider Summon / Retreat + Flyby KickMovement | Summon 4U · Retreat U (while mounted) · Flyby Kick 5U / 6U / j.2U (air OK) | 4U mounts the glider; U while mounted dismounts, with a controllable descent. Flyby Kick is an attacking kick that mounts the glider on contact and cancels into glider moves — his main way to get airborne mid-pressure or mid-combo. |
| Glider DashMovement | Direction + H while in Glider state · hold 1/2/3+H for low versions | Directional lunge that moves and attacks; straight up/down variants have no hitbox and the up version has evasion/invincibility utility. Every version cancels into other Glider Stance options (including another dash). The held 1/2/3 versions hit Low. |
| Glider AttackNormal | L or M while in Glider state (g.L, g.5M, g.XM) | His on-glider buttons: a forward scratch (L) and a missile-type Medium (M) that can be angled. These plus Glider Dash are the backbone of his air combos and glider pressure. |
| Razor BatsSpecial | 236 L/M/H · air OK · QS | Boomerang projectile whose angle changes per button. Chains up to three shots and can be threaded into other specials mid-animation. Usable grounded, airborne and on-glider. Heavy/EX version costs ~25 Skill Gauge. |
| Pumpkin BombSpecial | 623 L/M/H · air OK · QS | Cycles four bomb types, one available at a time: Sticky (slows), Explosive (launching), Poison (damage-over-time aura), Stun (electric). Air- and glider-compatible. The cyclical order is what makes his mix inconsistent. EX ~25 Skill Gauge. |
| Shock & AweSpecial | 214 L/M/H · QS | Forward strike. The Medium and Heavy versions hit HIGH (overhead) — a core mix-up starter — while Light does not. Cannot be used while mounted on the glider. EX ~25 Skill Gauge. |
| Glider RaidSpecial | 22 L/M/H · air OK · QS | Dive/raid attack whose behaviour varies by button. Air- and glider-compatible; used as a projectile-string ender and combo tool. EX ~25 Skill Gauge. |
| Assists & Tōkon AssembleMechanic | 6A Shooter · 2A Vertical · 4A Assault · j.A Aerial · 5A Assemble Rush · 5T tag-on-hit · 236L+A Tōkon Assemble | Goblin's assists mimic his own moves and are used for pressure resets and frametraps; his Assault Assist is 4A. Tōkon Assemble (236L+A) is his team-super/extension that big auto-combo routes cash into. |
| Sky ScraperSuper | 236 M+H · air OK · QS · ~50 Skill Gauge | Glider lunges forward then detonates; tracks the opponent when he's mounted, and is usable airborne/on-glider. Reportedly 20,000-plus damage. Trade-off: it consumes his Glider Gauge, leaving him weak in the neutral/okizeme that follows. |
| Goblin SurpriseSuper | 632146 M+H (Ultimate) · 100 Skill Gauge | Missile into a multi-hit, glider-mounted follow-up; more damage point-blank, reportedly 40,000-plus. Refills Glider Gauge on hit and can leave him mounted; holding R1 forces an immediate dismount. |
| Normals & throwsNormal | 5L/5LL/5LLL · 5M/5MM/5MMM · 5H/5HH/5HHH · 2L/2M/2H · j.L/j.M/j.5H/j.6H/j.2H · throw M+H · air throw j.M+H | Auto-combo Light strings self-chain into a launcher, so mashing L produces a full combo for beginners. Air normals (notably j.2H and j.6H) feed his jump-in and glider routes. His grounded normals are short-range — the acknowledged weak point. |
Inputs and move names are verified against the Dustloop MTFS wiki (the community authority); full frame data is not yet public — Dustloop's tables are still empty one week after launch. Difficulty is the official in-game 2-star rating (via EventHubs). Combo notation comes from the in-game Combo Trials (documented by Altar of Gaming); damage figures are approximate and cited from Sportskeeda, as ComboTier has no Green Goblin page yet. Updated August 2026.
Bread and butter
Green Goblin Combos
5L > 5LL > 5LLL (auto-combo) → 236L+A (Tōkon Assemble)
The just-mash-Light route: the Light string auto-chains into a launcher, then Tōkon Assemble tacks on a second wave. Highest-value beginner option.
Combo: Sportskeeda
5M > 5H > 214L (Shock & Awe L)
The game's own neutral Combo Trial — a consistent, low-commitment confirm off a key poke. Damage not yet published.
2M > 5M > 5H (jump cancel) > j.5H > j.2H
Ground-to-air extension from the in-game trials; your staple midscreen bread-and-butter before you commit to glider routes. Damage not yet published.
4U (Glider Summon) > g.L > g.L > g.XM > g.5M
A full on-glider string — his signature payoff, but it requires Glider Gauge and clean glider-cancel timing. Damage not yet published.
Inputs and move names are verified against the Dustloop MTFS wiki (the community authority); full frame data is not yet public — Dustloop's tables are still empty one week after launch. Difficulty is the official in-game 2-star rating (via EventHubs). Combo notation comes from the in-game Combo Trials (documented by Altar of Gaming); damage figures are approximate and cited from Sportskeeda, as ComboTier has no Green Goblin page yet. Updated August 2026.
Game plan
Green Goblin game plan
Neutral — own the air, deny the ground. Green Goblin does not want to sit in front of people; his normals are short and get stuffed. Instead, establish a projectile wall: stagger Razor Bats (up to three per string), drop the Pumpkin Bomb that fits the situation, and use Glider Raid to change angles. From the Goblin Glider you get flight and multi-directional dashes that let you drift just out of range, bait a whiff, and answer with a projectile or a Flyby Kick approach. Track which Pumpkin Bomb is currently loaded — because the type cycles, you are planning one bomb ahead, not reacting. Against characters who can contest your comfort zones, respect that you have little to fall back on up close and lean on runaway until you have a read.
Offense — mix, then cash out. Your opening usually comes from a projectile-covered approach or a Glider Dash cross-up, then a high/low: Shock & Awe M/H for the overhead, glider held-1/2/3+H for the low. Once you touch, convert to the biggest thing your gauge allows. The cheap-but-real beginner route is the Light auto-combo into Tōkon Assemble (236L+A) for 50,000-plus; as you improve, route through 2M > 5M > 5H jump-cancel into air normals, or mount the glider (Flyby Kick / 4U) for g.L > g.L > g.XM > g.5M. Feed Razor Bats and Glider Raid as combo glue, and aim combos toward a Wall Break — breaking the wall unlocks another team member and restores a bar of Assemble Gauge.
Defense, meter and the glider economy. Your central decision every round is the Glider Gauge. It drains while mounted and, once empty, must fully recharge before you can remount — and while it's empty you are a shadow of yourself, so create space and let it refill rather than forcing offense. Spend Skill Gauge deliberately: EX specials (~25) buy better launches, and Sky Scraper (~50) hits hard but burns your Glider Gauge, so don't fire it if you still need the glider for pressure afterward. Save 100 gauge for Goblin Surprise as a comeback/kill — it actually refills your Glider Gauge on hit. On defense, tag out (5T on a landed assist, or team switches) to hand the point to a stronger ground character while you recover the gauge off-screen.
TokonGuide Editorial · Launch patch · August 2026
Team building
Best Teammates for Green Goblin
His canonical Knights of Doom partner and the ideal anchor. Doom's own projectiles and strong assists cover Goblin's poor mid-range and buy the space he needs to recharge the Glider Gauge, while two screen-filling zoners stack into a genuinely oppressive wall.
Also Knights of Doom. Magneto's mobility and beam/assist pressure mesh with Goblin's approach coverage — call Goblin's Assault assist (4A) to lock the opponent down while Magneto repositions, and let Magneto's assist cover Goblin's weak grounded phase.
A setplay pairing: Goblin's Assault assist (4A) and projectile coverage reinforce Peni's corner traps and lockdown while she sets up her drones and wall cross-ups.
See all Marvel Tokon team comps
TokonGuide Editorial · Launch patch · August 2026
Watch and learn
Official Green Goblin guide video
What the video covers
- Glider movement
- Aerial disruption
- Ground projectile play
- Aerial assaults
Questions
Green Goblin FAQ
- Is Green Goblin good? What tier is he?
- He sits at B on our launch list, matching Screen Rant, Destructoid and Mobalytics. It's contested — Sportskeeda rates his air offense and combo ceiling high enough to call him 'one of the strongest'. The honest read: a high-ceiling specialist whose payoff is real but gated behind resource management and execution.
- Is he beginner-friendly?
- No. The game itself gives him 2 stars, its hardest difficulty, tied with Danger and Ghost Rider. Mashing Light gives newcomers a working auto-combo, but his actual strength — glider mix, projectile zoning, bomb tracking, gauge economy — is demanding to pilot.
- How do I play him?
- Zone from the air. Build a projectile wall with Razor Bats and Pumpkin Bomb, use the Goblin Glider to drift and cross up, then open with Shock & Awe overheads or glider lows and convert to a big combo. Above all, watch the Glider Gauge — when it's empty, disengage and let it refill.
- What are his bread-and-butter combos?
- Beginners: mash 5L into the auto-combo, then Tōkon Assemble (236L+A) for 50,000-plus. Core midscreen: 2M > 5M > 5H (jump cancel) > j.5H > j.2H. Neutral confirm: 5M > 5H > 214L. Advanced payoff is the on-glider string 4U > g.L > g.L > g.XM > g.5M.
Evidence trail
Official sources
- SRC-PS-USOfficial PlayStation US product page
Sony Interactive Entertainment
- SRC-PS-DOOMOfficial Knights of Doom announcement
PlayStation Blog / ARC SYSTEM WORKS
- SRC-PS-YT-GUIDESOfficial PlayStation Character Guide videos
PlayStation